From Midnight to Milk: The Two-Coat Path to Bright Walls
Bright Walls, Fewer Coats: A Professional’s Primer-First Approach
Why Light over Dark May Be Easy—When You Look at the Science
It takes more preparation, priming, and waiting than it does to figure out how to paint dark paint without going through endless coats to conceal the dark navy, charcoal, or espresso wall paint with a light hue. When the proper steps and materials are used, the new color is applied quickly, remains smooth to the touch, and stays true to the paint sample. This guide walks you through the pro process step-by-step, explains why it works, and demonstrates how to avoid the annoying traps that keep people rolling.
Prep That Saves You Coats Later
Preparation is cover-time insurance. Collect these must-haves:
High-grade, stain-blocking primer (water-based for normal surfaces; shellac or oil for serious stains)
Prime the area with a medium gray color (N5–N6) or a toned version of the finish color
High-end roller covers: 3/8" nap on smooth drywall, 1/2" on very lightly
Angled sash brush for trim and edges
Paintable caulks, light spackle, 120–220 grit sanding
Tack cloth or microfiber towels
Painter's tape and a 9" roller frame with extension pole
Drop cloths, bucket, grid, and a decent can opener to avoid metal shavings
A dust-mite free, clean surface enables the primer to adhere; the better the bond, the fewer the coatings thereafter.
Examining the surface and making minor repairs
Run a rake of bright light along the wall. Use painter's tape to mark nail pops, dents, and hairline fractures. Small imperfections should be spackled, allowed to dry, and then sanded smooth. Sand should be scratched until it becomes dull for dark, high-shine colors, particularly gloss or semi-gloss. If dusting during sanding is a problem, you can also degloss. Using a microfiber towel that is almost damp, wipe down surfaces. Once completely dry, tape and prime as usual.
Select the Aught-Twelve Prescript T
Primers do more than “stick.” They solve real problems that topcoat alone can’t:
Contrast control: A medium gray primer tones down the jump between black/ navy and an off-white/pastel. Gray has undertones neutral so that the color will be true-reading.
Stain blocking: Should the dark wall have marker, smoke, or water stains, apply a stain-blocking product. Shellac is the nuclear option against stubborn bleed-through.
Porosity leveling: Gaping patches and bare drywall soak up paint differently than surrounding area. Primer normalizes porosity so finish dries evenly—no flashing or ghosting spots.
For most dark-to-light repaint work, two skinny coats of gray-tinted primer will beat one heavy coat. Give every coat a chance to dry as directed; on-rushing primer is the guaranteed ticket to more finish coats down the line.
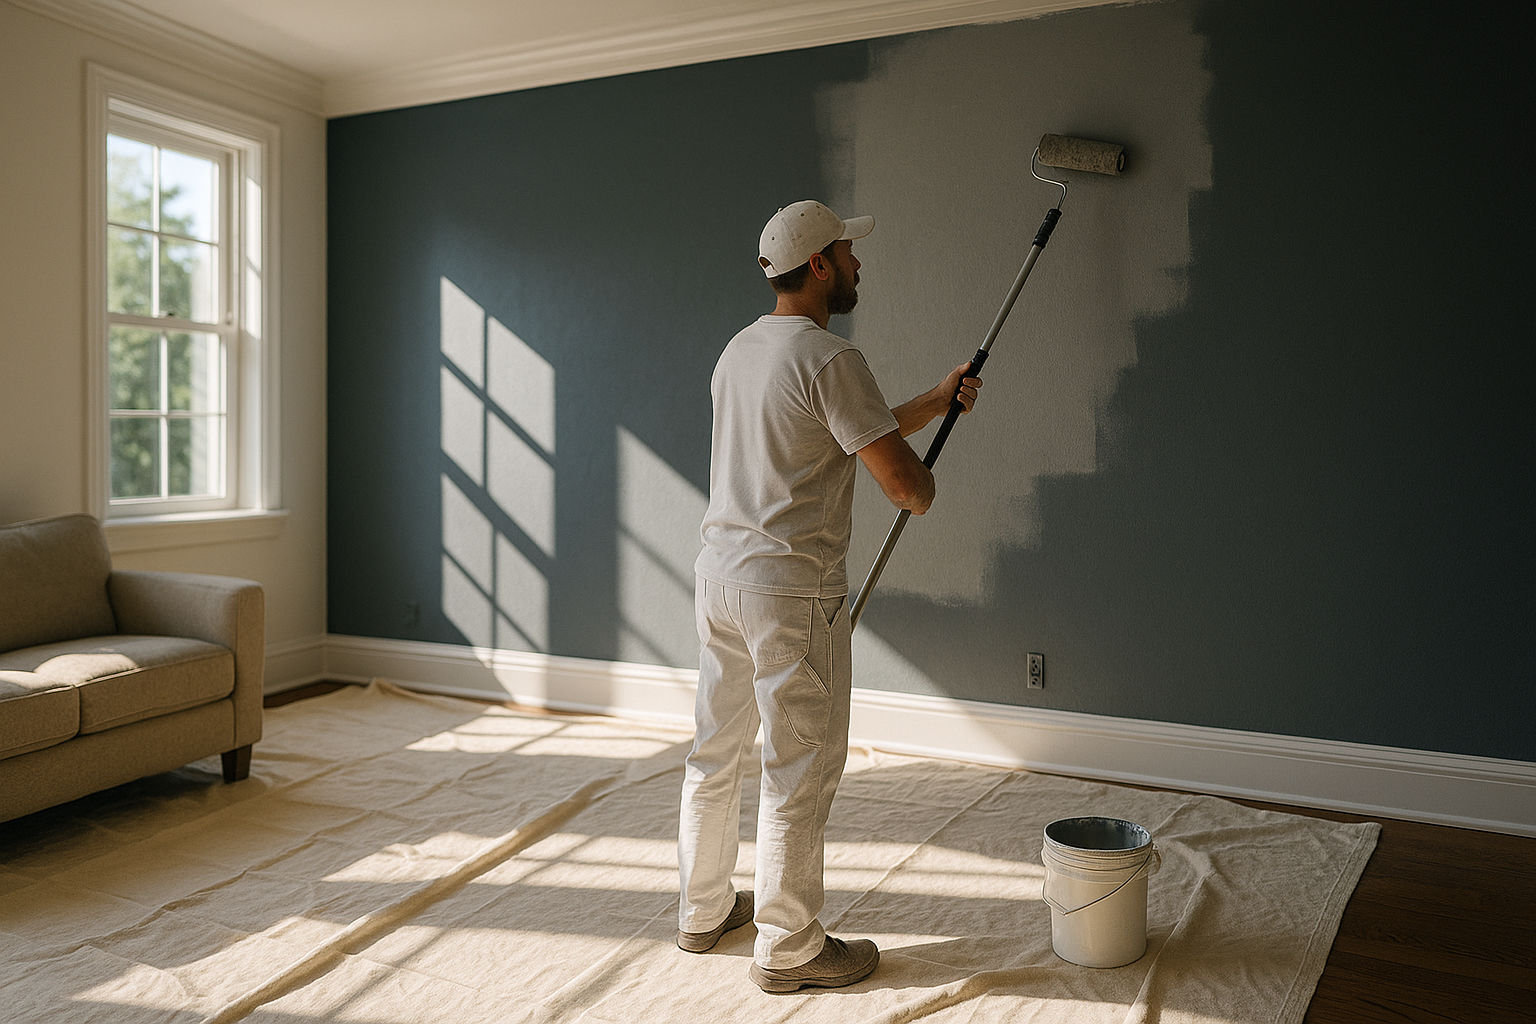
Dial in Your Roller and Brush Technique
Fill the brush half the height of the bristles and tap both sides of the can to prevent drips. With rollers, get rid of the tray and use a bucket with a metal grate; it distributes the paint perfectly and makes less of a mess. Paint in vertical sections 3–4 feet wide. Prime with an “N” or “W” stroke, then smooth out with long, gentle strokes. Maintain a wet edge to prevent lap marks.
Step-by-Step: From Dark Wall to Light, Clean Finish
Protect and stage. Rearrange furniture, put down drop cloths, and tape down edges. Remove outlet covers and cover hardware.
Wash and degloss. Wash walls with a mild degreaser. Scuff the bright surfaces to be made to appear evenly dull.
Patch, sand, and dust. To fill the holes, sand smooth, and clean down with a microfiber towel.
Prime smart. Roll on a thin, consistent coat of medium-gray or color-tinted primer. Cut along trim and ceilings. Dry completely.
Spot-evaluate. If the dark-colored ghosts-through-or-flashed zones demonstrate patches, then a second thin prime coat should be applied.
First finish coat. Keep paint well mixed. Cut in edges, then roll in manageable sections, with wet edge. Dry as per label.
Lighting check. Daylight and nighttime check. If it seems the coverage is 90–95%, you've just primed yourself for a sharp finish coat.
Second finish coat. Repeat the process again. Don't over-work partially dried areas.
Pass detail. Feather out small roller stipple, lift tape at 45° angle when paint is just soft, reinstall plates, and touch up small misses with artist brush.
Tint Your Primer—But Not Too Much
Tinting primer to the color of your finish accelerates coverage, and excessive tinting can undo block-out. Aim for 50–60% of the final color’s tint load, or simply request a neutral medium gray. Gray primer is almost always more productive than white primer with white topcoats because it cancels undertones and forces the use of fewer finish coats.
Problem-Solving for Bleed-Through and T
If the old paint covered raw trim, knotty pine, or water-damaged drywall, you may see yellow or brown shadows when you prime. Don’t keep rolling on finish paint. Wet those spots down with a tough stain blocker, let it dry, then keep going. Target repair is faster than hiding stains under four layers of latex.
Time Between Coats: Dry vs. Cure
Dry time is when the paint may be recoated; cure time is when it is in final hardness. Don’t skip the recoat window specified on the label—it’s typically 1–2 hours for primer and 2–4 hours for finish on typical conditions. You will lift paint if it’s too early; if it’s too late, the chemical bond between the coatings will be broken. Being one day late can be remedied by very light scuff sand to add tooth to the next coat.
Temperature and Humidity Rules
Paint flows and levels best at 50–85°F (10–29°C) with moderate humidity. High humidity makes water evaporation sluggish, causing film to be tacky and subject to scarring; low humidity may cause paint to dry so fast that you roll tracks into it. In basements or coastal areas, the use of a box fan and dehumidifier will decrease dry times by hours and enable you to limit yourself to two finish coats, not four.
Coverage Math Made Easy
A quality interior paint gallon will cover 350–400 square feet of smooth, primed area per coat. Divide the area of the wall of your room by two finish coats plus one priming coat, and adjust upward to accommodate cut-in and waste. Buying the right amount up-front eliminates the temptation to stretch thin coats—a main reason for holiday showing and the “one more coat” cycle.
Speed Tricks Advantages Depend On
Pros group similar jobs: they slice around the room, then roll neatly instead of dancing around the corners. They box paint as well (put together some gallons) to prevent slight color differences between cans. And they call it quits when the finish looks smooth at arm’s length under normal conditions—since chasing micro-blemishes usually brings some more along with it. If you like to skip the learning process the people at Paint Heroes follows the very same workflow and can handle problematic color transitions.
Cabinets, Doors, and Trim: Special Cases
Black doors and cabinets require special preparation as oils, shop grime, and mill finish do not want to bond. Degrease thoroughly, sand until evenly dull, and prime to enhance adhesion. On oak, a grain-filling primer is worthwhile later on. Spray might be worthwhile to achieve a glassy finish, but slow-rolling with a high-density roller can look almost as sharp.
Bathrooms and Kitchens
Steam, humidity, and grease change the equation. Choose primers and finishes rated for moisture and frequent cleaning. In baths, run the fan during painting and for several hours after each coat. In kitchens, do a serious degrease before scuff sanding; residues are invisible enemies of adhesion and the #1 reason paint peels prematurely over dark, glossy walls.
Errors That Create “Endless Coats”
Skipping the primer or painting regular white primer over black or navy
Moving along too fast with dry ends that glisten thereafter
Working the paint excessively, which works the film
With bargain rollers that shed lint and lay down thin, irregular coats
Overlooking temperature and humidity limitations
Failing to repair porosity differences before priming
One error gives one more pass. Avoid them, and two finish coats after smart priming is the rule—rather than the exception.
FAQs
Must I always apply two coats of primer above highly darkened hues?
Not always. One well-applied gray-tinted primer coat will typically do the trick. Apply a second if the dark color stain or the stains persist ghosting through.
Should I skip sanding if I have a bonding primer?
Scuffing sand still works, especially over shiny paint jobs. It provides mechanical bond and gives your primer come down slick.
How can one get black hair removed permanently?
It's medium-gray primer, not white. Two thin finish coats of whatever white you like in eggshell or satin provide the brightest, cleanest finish.
Is paint-and-primer-in
Handy items, but no stain eraser either. Two finish coats and dedicated primer is still the cleaner, faster alternative when one is covering a dark wall with a lighter color.
Everything You Should Know About Painting Inside Your Home
Learn the Secrets Behind a Professional-Looking Interior
Choosing the Right Paint Finish for Each Room
The Cost of Interior Painting in 2025
The Best Paint Colors for Bedrooms in 2025
Kitchen Paint Ideas That Instantly Upgrade Your Home
Bathroom Paint Colors That Resist Moisture
The Psychology of Paint Colors Indoors
Accent Wall Ideas That Work in Any Home
Living Room Color Palettes That Impress Guests
Painting Ceilings the Right Way
How Lighting Changes Paint Colors Indoors
Eco-Friendly Paints for Interiors
How to Match Furniture With Wall Colors
How to Paint Trim and Baseboards Like a Pro